SWM16-KM | SWM Series UHF 16 Channels Wireless Microphone Karaoke Mixer System w/ Bluetooth, Metal Mixer, 2 Handheld Mics
Sound Town Inc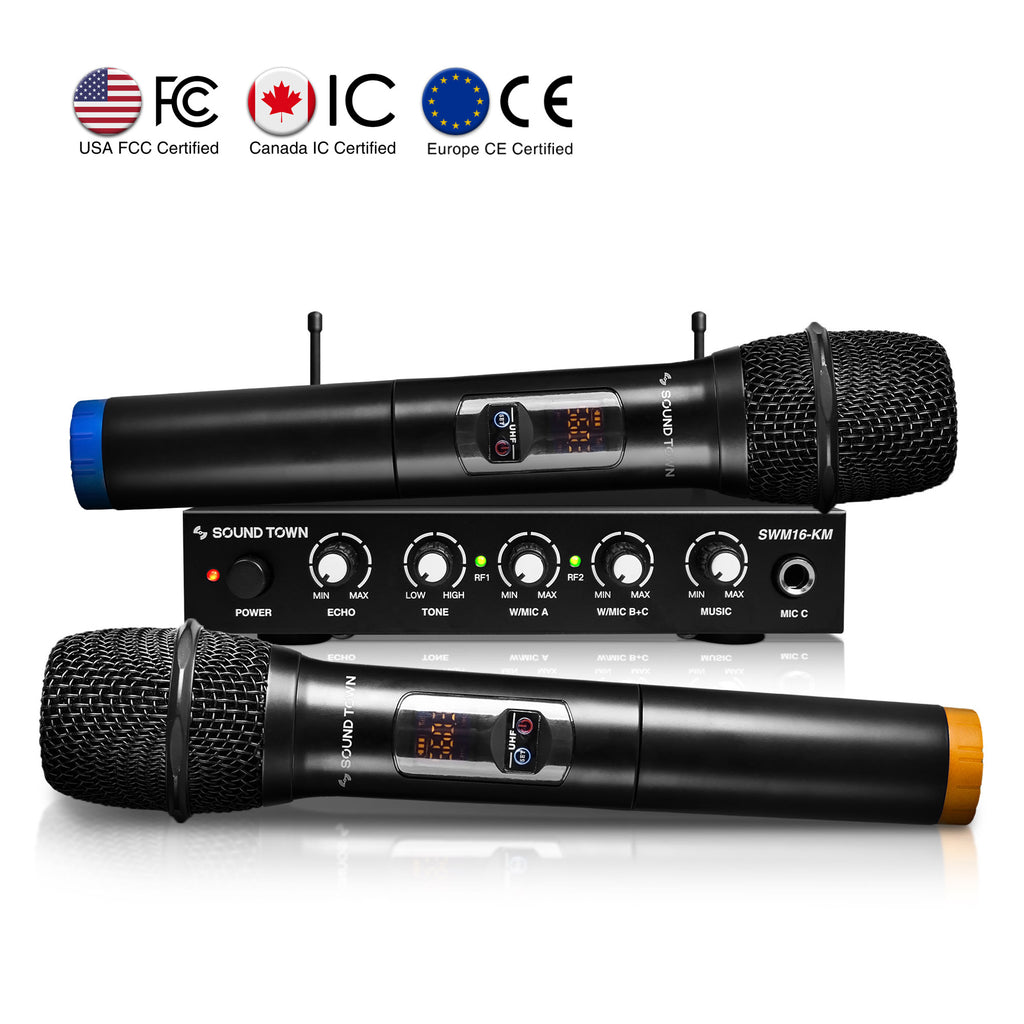


 English
 简体中文
简体中文 Русский языкEnglish
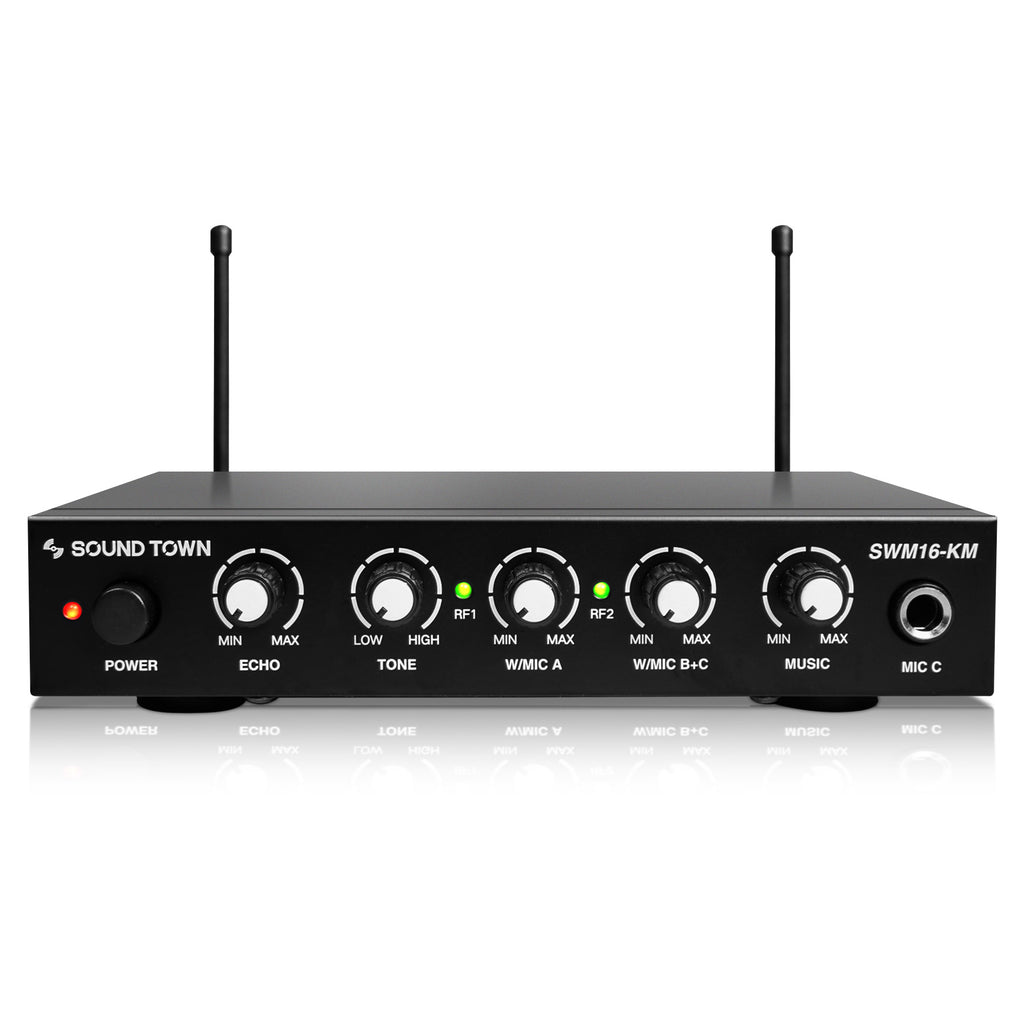
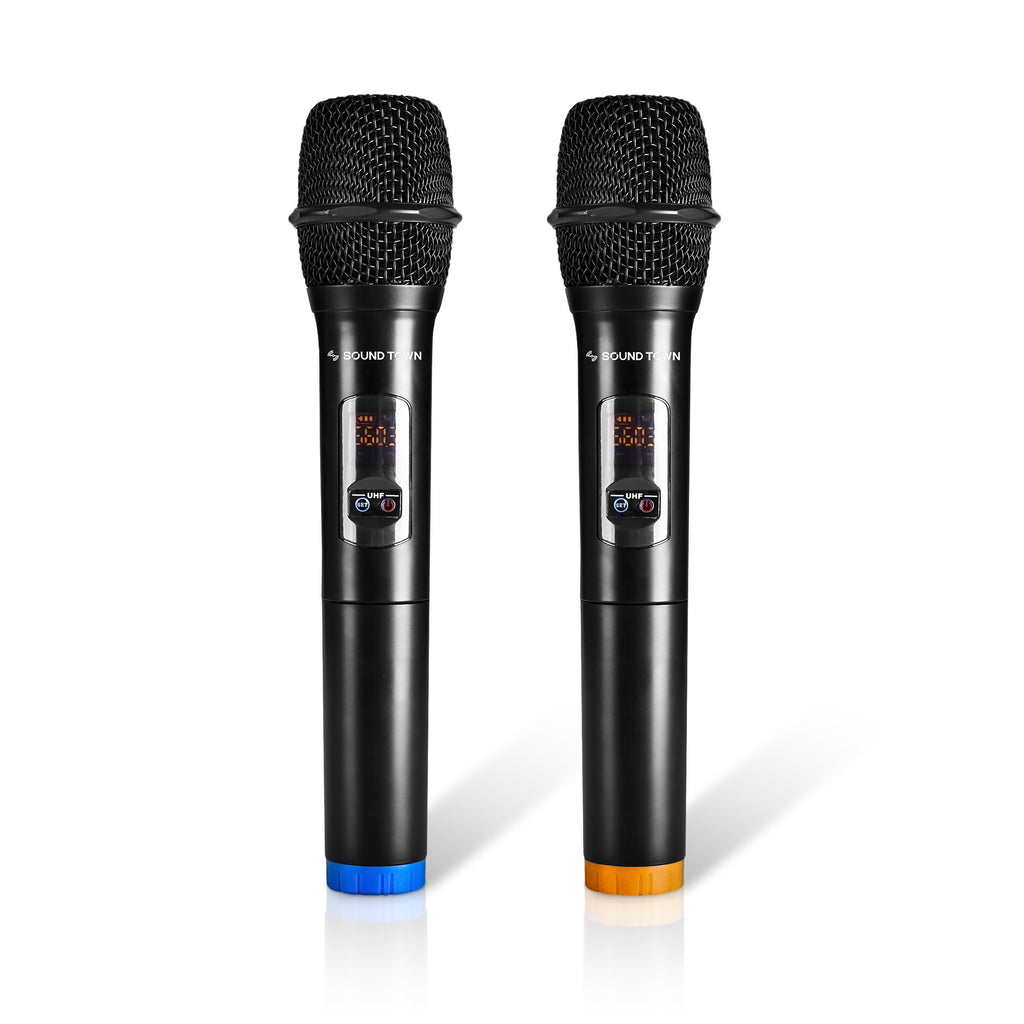
The Sound Town SWM16-KM is a compact wireless microphone and karaoke mixer system. It comes with dual-channel, 8 selectable UHF frequencies per channel (16 channels in total) and is interference free. The receiver has one 3.5mm (1/8”) TRS input, one 3.5mm and 6.35mm (1/4”) TRS output connectors, plus built-in Bluetooth for easy setup with your home theater or speaker system. It works with a wide range of devices including phones, tablets, PCs, laptops, home receivers, speakers and etc.
The microphone receiver and sound mixer enable you to mix mic signal with music without using an additional mixer. It comes with two wireless microphones and can support two wired dynamic microphones (not included). The rotatory control knobs can swiftly adjust the volume of your music, microphone, echo and tone to the desired level. The built-in pop filter reduces potential popping sound and helps deliver consistent and superb sound quality. It’s ideal for karaoke, house parties, conferences, broadcasting, weddings, social events and any small to medium-sized venues such as meeting rooms, auditoriums, schools, churches and stages.
Setup Requirement: The wireless microphone system needs to be connected to a powered speaker (with 1/4" or XLR inputs) or an amplifier to work. These devices are sold separately.
(1) SWM16-KM Receiver/Mixer
(1) Power Adapter
(2) Wireless Handheld Microphones
(1) 3.5mm (1/8”) to 3.5mm (Male to Male) Audio Cable
(1) 3.5mm to RCA (Male to Male) Audio Cable
(1) 6.35mm (1/4”) to 6.35mm (Male to Male) Audio Cable
If you are having trouble with your microphones, first we need to clarify which batch your microphone is.

BATCH 3: Single Button Microphone
---------------------------------------------------------------------
▶ If you have a dual button microphone, while the microphone is turned on and while pressing the set & power button simultaneously, do not let go until one of the following happens:

BATCH 2: The CHA or CHB blinks repeatedly.

BATCH 1: The signal bar on the upper right corner of the microphone screen blinks repeatedly.
BATCH 1:
1. To change your microphone to a different channel:
2. To pair your receiver to the microphone:
BATCH 2:
1. To pair your receiver to the microphone:
BATCH 3:
1. To pair your receiver to the microphone:
Specifications
Dimension & Weight
| Product Width (in.) | 6.7" | Package Width (in.) | 12.6" |
| Product Height (in.) | 1.6" | Package Height (in.) | 2.6" |
| Product Depth (in.) | 5.5" | Package Depth (in.) | 11.0" |
| Product Weight (lb.) | 1.1 lbs | Package Weight (lb.) | 2.9 lbs |
Warranty/Certifications
| Manufacturer Warranty | 1 Year |